As a beginner, you might be searching for the best way to manage WordPress plugins so that you put in less time managing WordPress add-ons than the actual content. In this guide I am going to take you to a tour around WordPress plugins regarding compatibility, installation, deleting and many other aspects.
So if you don’t want to go through every management function for plugins one by one and testing out which one is useful for you, this guide presents you with a complete walkthrough related to managing WordPress plugins.
What is a WordPress plugin?
A WordPress plugin is a piece of software which allow you to add some functions in your Website. In other words, plugins are used to include new features in your WordPress website without any need for developer skills.
To make your work simple there is almost every type of plugins. For example, they help you to create an online store or a photography site. You want to add social icons on your website or want to speed up your website. There are plugins for almost everything which makes WordPress more useful and easy to use.
How to Properly Manage WordPress Plugins
This guide covers
Quick Navigation- Checking the plugin compatibility with your WordPress
- Is this plugin good to install?
- How to Find and install a WordPress plugin?
- Updating plugins
- Manage plugins with bulk action
- How to disable plugins?
- How to Uninstall a plugin?
Checking Plugin Compatibility With Your WordPress
Before you go for installing and activating a plugin you must make sure that specific plugin is compatible with your WordPress version. Fortunately, this process is simple and quick.
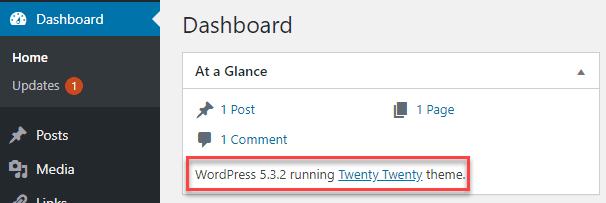
So, first of all, you need to check your WordPress version. You can find your WordPress version right in the dashboard screen. Look at the image below
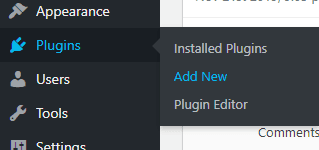
Now in order to check plugin compatibility with WordPress go to Plugins > Add New.
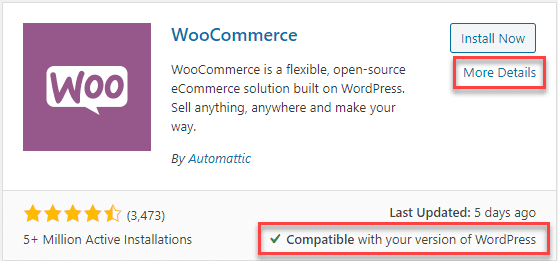
Search for a plugin that you want to install like for instance I searched for WooCommerce and WordPress shows me the plugins along with the status ‘Compatible with your version of WordPress’. It means that they have tested that the plugin is compatible with my current version of WordPress.
Furthermore, you will also see “More Details” link with every plugin. Go ahead click on that.
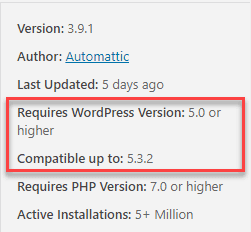
After clicking a pop up will appear with many details along with required WordPress version for the plugin to work properly. So you can compare plugin ‘Requires WordPress Version’ with your WordPress version. They also mention up to what version of WordPress this plugin is compatible with.
Just take the example of a plugin shown in the below image. It shows the plugin is compatible with any version of WordPress ranging from 5.0 to 5.3.2.
You don’t have to worry about whenever you update your WordPress to a newly released version. Usually, developers also check their plugin compatibility against the latest WordPress version so their user can enjoy plugin functionality with no hassle.
Is this Plugin Good to Install?
To adequately manage WordPress plugins it is crucial to know is the plugin good to install before we actually move to install a plugin. A plugin which did not receive any update for more than a year may have some loopholes which cause the vulnerabilities to get into your website. Moreover, because it does not update for a long a time so there are also chances it may not compatible with your WordPress version.
Luckily WordPress shows a number of stats when you are going to install a plugin allowing you to determine whether a plugin good to install or not?
When you are going to install a plugin you will see ‘More Details’ link with every plugin so click on that.

A pop up will appear with stats such as
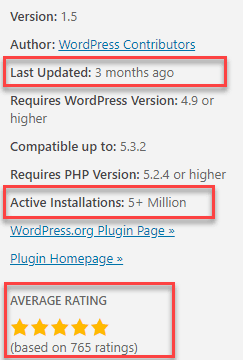
Last Updated: shows when the plugin last updated. The more recent the time the better for you. Below image shows the plugin last updated 3 months ago which is good. You can trust a plugin that receives its last update for like 6-8 month before.
Active Installations: More installations means that more people trust on this plugin. I think a plugin that has at least 1K installs is good to go.
Average Rating: It shows the number of people who rated the plugin. The Stars shows the average rating of all the people who rated this plugin.
Moreover, WordPress also shows a warning message for plugins which have not been updated for a while as shown in the below image.

or

How to Find and Install a WordPress plugin?
WordPress is designed in a way that a beginner can easily manage it and thus share his/her valuable information with the world.
The easiest and quick way to install WordPress plugins is through the plugin page in your WordPress dashboard.
So first thing first, Login into your WordPress admin area.
Go to Plugins > Add New.
Then a plugin page will show up where you can search for the plugins. Type the plugin name. Probably you are confused that how do you know the name of a plugin?
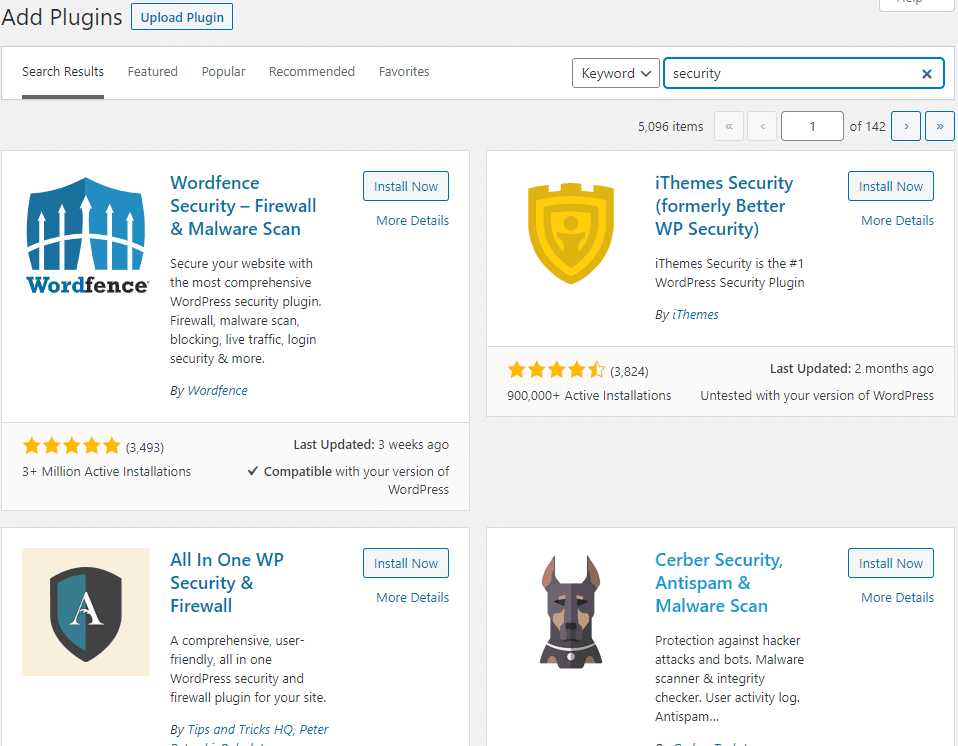
The good thing you can also type the functionality you looking for such as security, social icons, and speed etc. like I did in the below image.

After typing the name or functionality you looking for the WordPress will show up a list of plugins related to your query like in the below screenshot.
Now move ahead pick the plugin that suits your needs. By clicking on the ‘More Details’ link that is shown with every plugin you can learn more about a plugin that what features it has to offer you.
I have already told you how you can quickly figure out which plugin is best to use. For example, in the above screenshot as I searched for security you can see Wordfence has pretty decent rating, compatible with my WordPress version, has a huge number of installations. It means a vast number of people using this plugin and has trust in it.
So for installing, I will go for Wordfence and click on ‘Install Now’ button.
After clicking, WordPress will download and install the plugin automatically. Once done you will see the ‘Activate’ button as in the below image.

At this stage, it is installed on your website however a plugin won’t work unless you activate it. So go on and click on Activate. That’s it.
Updating Plugins
Properly updating a plugin is an imperative part to understand if you want to manage WordPress plugins effectively. Fortunately, WordPress automatically check for the updates and notify you whenever core WordPress or plugins updates are available.
Visit step by step guide on how to properly update WordPress plugins which explain everything related plugins updates.
For installing plugin updates simply visit Plugins > Installed Plugins. In the plugin page, you can see if a plugin has an update available.

Hit a click on ‘update now’ and WordPress will automatically do reset of the job.
Tip: Whenever a new update comes out I suggest you don’t just run to update it unless it is a security update. You can see what changes will this update make by simply clicking on the ‘View details’ shown with each installed plugin. You should wait like for a week before updating because usually during this time all the errors fixed attached to the new version.
Manage WordPress Plugins using Bulk Action
Do you know for effortlessly managing plugins WordPress allow you to perform specific actions on the selected plugins at once? Consider the case you logged into your WordPress dashboard and what you see, there are 5 plugins asking for updates.
With bulk action, you don’t have to click one by one on the ‘update now’ shown with each plugin.
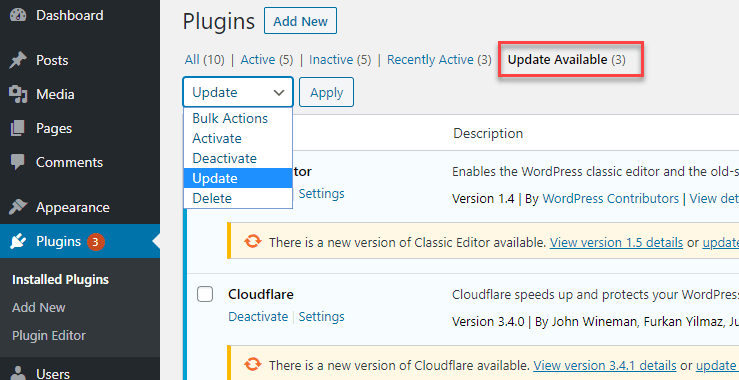
First, visit the Plugins page and then click on ‘Update Available’ tab which is shown at the top. Now only plugins that have the update available will show to you.
You can also select the bulk action from the drop-down menu shown on the Plugins page. Check the small box appear near to the plugins name and then click on ‘Apply’. That’s it.
In this way you can apply Activate, Deactivate, Update and Delete action on multiple plugins.
How to Disable Plugins?
Disabling a plugin is a great feature to utilize if you don’t want to use the plugin functions for some time or if the plugin is not working properly.
Sometimes plugins cause site slowness that is why you may want to disable some plugins so that make your site load faster. You can find the plugin that is causing sluggishness for your website by disabling all and then activating one by one.
To disable a plugin first login to your WordPress admin area or dashboard. Then go to Plugins > Installed Plugins.
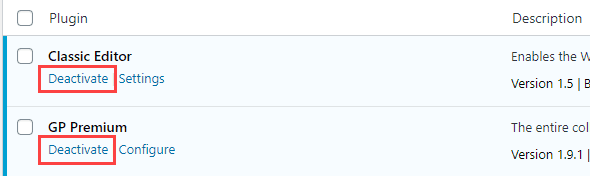
With each plugin, you will see a link to ‘Deactivate’ a plugin.
By deactivating a plugin means you stop its functionality, for example, if you are using boxes in your posts via shortcode plugin then disabling that plugin makes those boxes disappear from the posts. So keep in mind that. It means deactivating a plugin will also disable all the changes you made with that plugin.
How to Uninstall a Plugin?
WordPress not only enable you to install plugins easily but also allow to get rid of any plugin within a matter of a few seconds. Every plugin has a safe and easy uninstaller.
The quick and safe way is located right on the plugin page.
So, login to your WordPress admin area then goes to Plugins > Installed Plugins. In order to uninstall a plugin, first, you need to ‘Deactivate’ that plugin.
After deactivating, a delete link will appear in red colour so go ahead click on ‘Delete’. A dialogue box will appear asking you ‘are you sure you want to delete’ just click on OK. That’s it.
Last but not the least, installing tons of plugins on a cheap quality hosting may slow down your website speed. So if you are using a very basic plan I recommend you try to avoid any unnecessary plugins. Furthermore, when you don’t need a plugin anymore don’t just deactivate it. Make your hosting lightweight by removing any unnecessary plugins.
I strongly recommend Siteground and if you can afford WPEngine. Both are excellent hosting providers and can easily bear loads of plugins.
I hope at this point you have learned how to manage WordPress plugins and feels pretty confident in doing so. If you are facing any trouble at any point feel free to contact me through comments. Have a nice day.