If you are a beginner and worried that how to improve your website security I have put together a checklist of factors to enhance website security. By checking your website against these factors you can feel free and stay focused on your content.
Keep in mind your website security holes to hackers are higher than you may think. Whether you are a novice or an experienced person you must not endanger your efforts by ignoring the below checklist of basic but most crucial facets of your website security.
Quick Navigation- What are Common Website Security Threats?
- 19 Simple Steps to Improve Your Website Security
- How to Fix a Hacked Website?
Here look at some facts why security should be your priority
- There is a hacker attack every 39 seconds according to Security Magazine.
- According to Thycotic hackers, traditional firewalls are not even an obstacle for them.
- Around 43% of attacks targeted small businesses.
- The cybersecurity budget in the US for the year 2019 was $14.98 billion.
- 95% of online security breaches occurred due to human errors.
- According to a well-known anti-virus company McAfee hackers create 300K malware daily.
WordPress makes it a lot easier to build a website. If we only talk about the website built using CMS then alone WordPress covers 60% portion. This content management system is not just popular among individuals but also government and agencies taking benefit of WordPress easy usability and flexibility.
So this guide covers security measures that how a WordPress user can do as well as general security measures that everyone must do regardless of what CMS they are using.
Note: I think there is no need to point out why security is important for your website or blog. Simply if you worth your time and money that you spend on your website then you need to improve your website security.
Before advancing to the steps for improving website security let’s take a quick look at common website threats.
Malicious software and Virus
Malware and viruses are known to be the biggest threats to all types of websites. A malware come in the form of
- Bot
- Ransomware
- Adware
- Virus
- And Trojan Horse etc.
Malware attacks are often used to eat up your server resources to max level or steal your confidential data. The hackers use malware to get into your website and so to make money through ads or affiliate links.
With malware attacks, you are not merely the one who gets affected but also your site visitors. For example, by clicking on a link it will download malicious software on your website visitor computer.
Phishing
Many of us experience this fraudulent activity but may not familiar with the name “Phishing”. In this, the criminal person sends fake emails to pretend to be the official company. The email is designed in a way to look professional.
The objective of phishing attacks is to obtain your username, password, bank details or credit card details, etc.
SQL injection
An SQL injection is based on a code that uses to get into your website database. Via this attack, the perpetrator intends to gain access to the data that you don’t want to make visible to the public such as valuable customer information. In the worst case, the attacker may give themselves admin rights so they can play around freely.
Spam Comments
Not all comments are harmful to your website but sometimes a comment may contain a malicious link. In this, the attacker may use bots to hammer your website with tons of comments. Such type of spam is very common on websites. However, when search engine bots found malicious URLs that spam comments contain, it may affect your website SEO negatively.
DDoS attacks
A well-known threat to a website is DDoS attacks. In 2016 some giant companies such as Paypal and Netflix are attacked using DDoS. The attacker denies your website traffic to access your website.
So what a hacker does in DDoS attacks? The hacker using bots flooded the website bandwidth using spoof IP addresses and eventually, take your website offline.
So above are the common but most harmful threats to websites.
Now without further ado, here is a list of factors that you must follow to safeguard your website from bad guys.
How To Improve Your Website Security 2021
1. Share Your Password With Least
The person who holds the administrative rights has the ability to change the website structure which includes the layout, theme, and installing/uninstalling plugin. In short, that person got the power to make any type of changes to the website whether owned the website or not.
So when this goes wrong that when you share your administrative account details (email and password) with too many people. This is your first line of defense which may compromise if you share your password with others and if you are not changing it regularly then it will produce really a problematic situation.
And if a tool like Keystroke is installed on the individual computer (with whom you shared your password and username) then your password may reveal to the peoples you don’t want to have it.
So if you have to share a password with other users for a specific purpose just make sure to change it after that or use the WordPress assigning role feature to add a new user with specific access.
2. Host Your Website on a Secure Web Hosting Provider
Hosting is where your website data stored like images, web pages, and posts, etc. What I strongly recommend as most good hosting companies offer very competitive pricing so don’t risk your project security to save few pennies. A web hosting company with a good reputation should be used for hosting your website, blog, or web application.
So how do you know which company is well secured to host your professional website?
A convenient way to check their online reviews to see a company rating on BBB. Furthermore, visit the web hosting company website they surely have the page where they mention their security measures.
You must also check, are they actively talk about online security threats on their blog? Are they updating their services to improve their security? And most importantly is their technical support available 24/7. As web hosting is the foremost element it is wise to invest a good amount of time in searching for a secure and reliable hosting provider.
In case if you want to know some of the secured web hosting companies. SiteGround, WPEngine, and Kinsta are among the top secured companies.
For a beginner, SiteGround holds really affordable hosting packages. And their technical customer support is just outstanding which stays available 24/7/365. If you don’t feel comfortable on the phone you can quickly connect to them using Live Chat.
3. Use a Strong Password
Always use a strong password I can’t stress this enough.
So what does mean by a strong password? When I said a strong password it means to use a combination of alphabets, numeric, and symbols. The harder your password the harder for the hacker attack like Brute Force to detect your password.
Here look at some not to do things while making a password.
- Don’t use your name or domain name
- Don’t use a dictionary word
- Never use easily guessed passwords like ‘password’, ‘admin’ or ‘user’ etc.
- Avoid using the same password for multiple websites.
- The password should be different from your email account password
- If you can’t remember your password don’t place it in an obvious location
- Don’t use your birthday, phone number, or vehicle number
So what you should do while creating a password?
- Do use upper and lower case.
- Use a phrase or a sentence like some quote or a song lyrics you tend to remember. You don’t need to use that whole sentence/quote instead pick words from it.
- A password must be a combination of alphabets, numeric and some symbols
- Make your password long (at least 8 words)
4. Use 2-Factor Authentication
Besides using a strong password, Two Factor authentication is another solid obstacle for intruders. You can easily enable 2-F authentication using a plugin. There are lots of plugins (free and paid) it’s up to you which one you go for.
The free plugins allow you the main functionality (2-factor authentication) however paid plugins offer you more features like sending OTP (One Time Password) via SMS on your phone.
So if you don’t want to go for a paid plugin that’s ok you can surely use the free plugin. Here note that free doesn’t mean that plugin is weak in security.
In order to enable 2-F authentication
- Go to your WordPress dashboard.
- Install and Activate Two-Factor
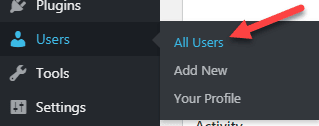
- Now on the WordPress dashboard go to Users >> All Users
- Select the profile on which you want to activate 2-Factor authentication.
- Scroll down until you saw “Two-Factor Options”.
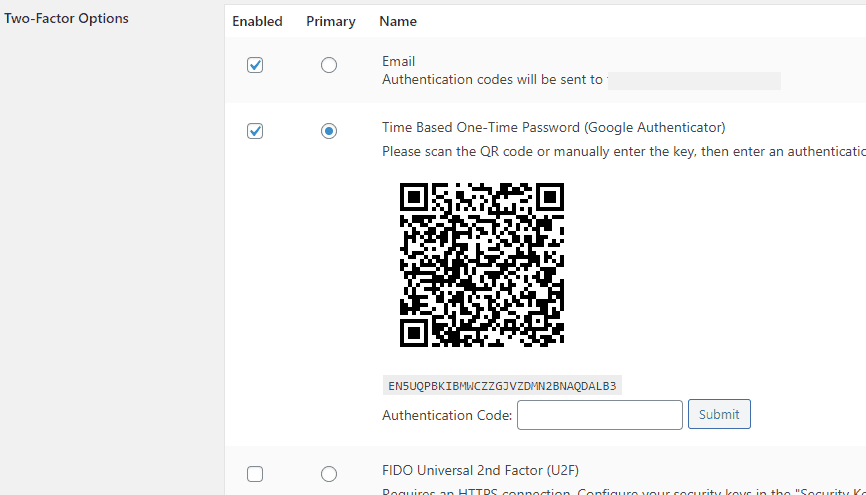
The good thing you can enable more than one method so that if for some reason you are unable to use the Primary method you can easily log in using the secondary.
- Enable both “Email” and “Time Based One-Time Password”. Set the Time Bases One-Time Password to Primary as shown in the above image. However, if you want to login using email where the system will send OTP on your email then select the Email method as Primary.
- Now install the “Google Authenticator” app on your phone. It is available for both iPhone and Android.
- Scan the QR code that you are seeing on your WordPress backend using Google Authenticator mobile app. The app will present you with a code.
- Go back to WordPress, type that code in the field next to the “Authentication Code”.

- And it’s done.
5. Always Create Backups
As much as you want to avoid disasters they can happen at any point in time. When a security breach or malware-infected your website the immediate and safest way to get everything back is to restore a backup.
If you are creating your backups every time you update your website it’s a good habit and can solve your problem in a matter of seconds. Most web hosting companies include backup services in the web hosting plan. However, the backup service you get with their most basic plan usually hooks up with some limitations and offers you less control on backups.
So I always recommend using a separate backup service as making backups is enormously easy. There are tons of free and paid plugins for WordPress for making backups.
I already published the most detailed guide ever made on how to create a complete backup of your WordPress website. I mentioned multiple ways to create a backup so check that out. The guide not only mentions the ways to make a backup using a plugin but also without a plugin.
6. Limit Login Attempts
If more than three attempts are made to login to your website from the same IP address then the system will temporarily ban that IP address like for 30 min. The attackers use different password combinations and IP addresses so blocking them wastes their time and eventually urging them to go somewhere else.
So how to enable limited login attempts?
While installing WordPress through a 1-click installer you will see an option asking you if you want to enable a Login attempt. If you check the box it will automatically install a plugin in your WordPress and enable the limit login feature.
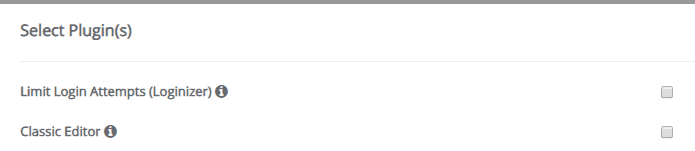
If you did not check the box while installing WordPress just login to your WordPress dashboard. Install and activate the free Loginizer plugin.
Upon activating the plugin, you can access its setting from the WordPress sidebar.

You can alter the settings like Max tries, Lockout Time, Rest Retries, and some more. So it’s a good line of defense against Brute Force attacks.
7. Change Your WordPress Backend Dashboard Login URL
After installing WordPress the process presents you a login URL which you then use to access your WordPress backend dashboard.
By default, the login URL is usually like yourdomain.com/wp-login
If you are using the default login URL then what I can say. You are yourself inviting the hacker for a security breach.
Changing a WordPress Login URL is an important part of improving your website security.
Thankfully changing a URL is super easy. There are tons of plugins like WPS Hide Login, and Rename wp-login.php, etc. but what I recommend to install and activate iThemes Security (formerly known as Better WP Security). The reason is that you surely need a good security plugin.
iThemes is a great plugin that comprises tons of security features including virus scanning, Brute Force Protection, database backup, change login URL, and many more. The plugin also has a paid version that enables you to set schedule malware scanning, Passwordless Login, and 2-F authentication, etc.
However, you can change the WordPress login URL for free.
So after installing and activating the plugin, you will see a “Security” option added in the WordPress dashboard sidebar. Click on it.

Go into the “Advanced” tab and then configure “Hide Backend” settings.
(click to enlarge the picture)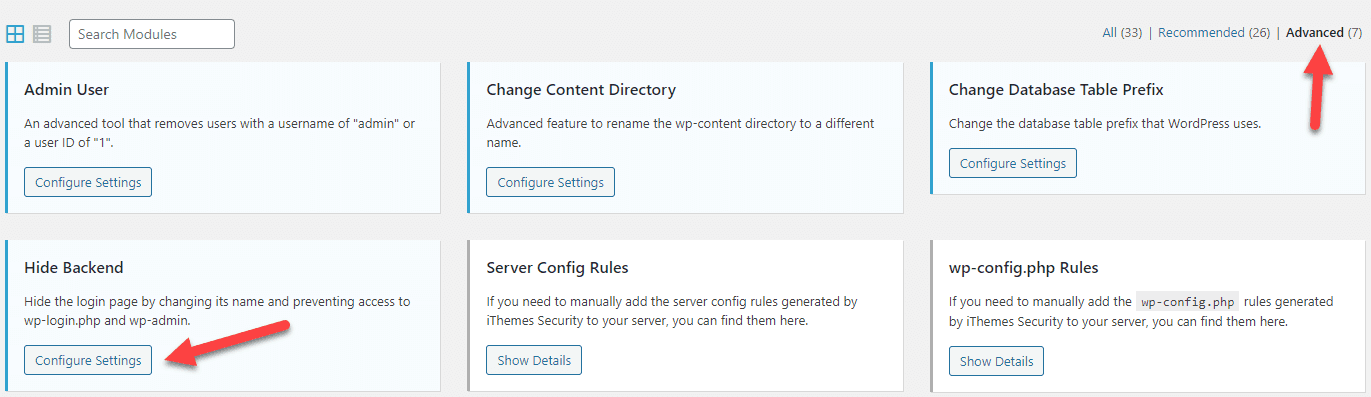
Check the box “Enable the hide backend feature.”
Type words you want to include in the Login URL to the field given next to the “Login Slug”.
Like if I type ht34bU8q23fdc5lk then the login URL will be
http://bloggingsilo.com/ht34bU8q23fdc5lk
Don’t forget to “Save Settings”.
That’s it you have successfully changed the login URL.
8. Scan Your Website Against Malware
If you can’t see malware, it doesn’t guarantee that your website is free from malicious things. That’s where scanning your website for malware is so important. The more regularly you perform scans, the faster you can detect problems and eradicate them.
There are various well-known plugins you can use for scanning such as
- Sucuri
- Quttera Web Malware Scanner
- SiteGuarding
- Wordfence Security
- iThemes Security
Just go to your WordPress dashboard. Sucuri is a well-reputed security plugin. Install and activate it.
You will see “Sucuri Security” in the sidebar.

Go to Dashboard, you will see a security check status once you are in the dashboard. Furthermore, you can also schedule a scan for specific tasks.
9. Use Secure SSL (HTTPS)
SSL becomes a vital prerequisite for all types of websites. If you are not using HTTPS then it means the data being transferred is not encrypted. So there are higher chances that third parties like hackers can intercept to steal your customer information as well as login details.
In simple words, you can understand it as an essential security measure to protect important information.
This is notably vital for e-commerce websites since the customers are submitting their sensitive information such as credit card numbers, phone numbers, and email addresses, etc. So to hide such information from third parties, an eCommerce site must use HTTPS which encrypts the flow of information between server and browser.
Besides security, HTTPS also gives your website a little SEO juice, as Google stated. So yes it helps in improving your site search engine ranking.
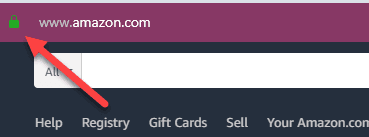
How do you know a website enabled with HTTPS?
Simple, when you visit a URL, for example, Amazon you will see a lock sign or https:// in the browser address bar.
Below is an example of a website not using HTTPS.
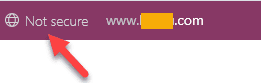
Now, most web browsers show a warning message if you visit a non-https website as an insecure connection. The user may leave your website instantly so eventually it will drop your traffic significantly.
How to Enable HTTPS (SSL) For Free?
At the time of purchasing a hosting plan check their plan if it includes an SSL certificate. Fortunately, almost every hosting company includes let’s encrypt SSL in all of their plans without charging any additional cost.
After installing WordPress, head over to the provided control panel you will see the SSL option there.
Tip: Every web host provides a tutorial on how to activate their free SSL.
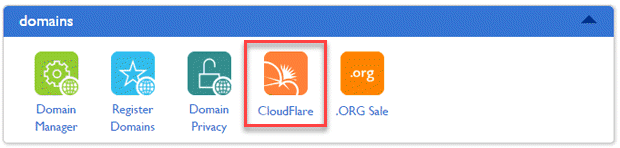
10. Use Cloudflare For Improving Your Website Security
Cloudflare is a service that offers both free and paid plans to make your website loading time faster as well as improve website security. Cloudflare cache your website content on their data centers around the globe.
Almost every hosting company provided control panel comprise Cloudflare option that assists you to link it with your website. For illustration, below is the Bluehost cPanel screenshot.
Cloudflare permits you to filter out malicious traffic. It forces the malicious IP traffic to solve a CAPTCHA before landing on your website. This way it not only improve your website security but also saves your bandwidth.
In a free account, they provide you protection against DDoS attacks. Cloudflare allows you to set the level of security for your website like if you see your site is under attack you can set it to high alert.
While if everything is fine you can set the threat level from low to medium so that fewer users face the CAPTCHA and can directly visit your website.
The good news, if your web hosting provider does not offer you free SSL, Cloudflare’s free account contains an SSL.
11. Use WordPress Secret Keys
You might not aware of this term but this simple step can significantly enhance your website security. WordPress security keys are a set of variables that encode the information stored in the user’s cookies.
A password and username which is not encrypted are easy to crack for the user. While the use of secret keys makes it harder for the hacker to crack your password.
It will encrypt the password like “910b32d46bf8a8fe1eba”. It’s probably taken years to find the right combination. So you should absolutely use secret keys.
How to use WordPress secret keys to enhance your website security?
- First visits the key generator to copy your unique WordPress secret keys. The keys will look like as shown below. Of course, your keys are different from mine.

- Now login to your hosting control panel like cPanel.
- Find and click on “File Manager”. It is under the Files section.
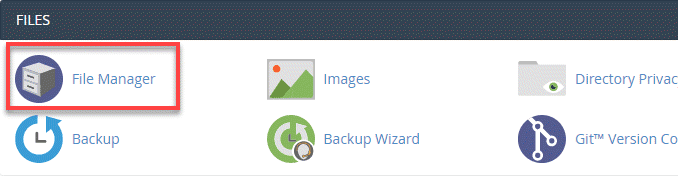
- Go to the WordPress installation directory. It is by default inside Public_html (you will also see wp-admin and wp-content folder etc. which shows you are in the right place)
- Find the wp-config file and open it.
- Scroll down and find the following text

- Now just paste the unique keys that you copied at the first step in place of the text shown in the above image.
12. Don’t Use Cracked Themes
This security risk is normally encountered by beginners with a limited budget. A theme is the most imperative part of a website as it is the first thing your audience will see. The people who want to set up a website but don’t have enough money, sometimes use cracked themes so that they present their audience with a good looking appearance.
A cracked theme may include a malicious code that can compromise your website security and so that jeopardize your success.
Furthermore, cracked themes won’t get any updates, and also you won’t able to get support in case you need help from human technical support.
So what I recommend?
Well yes, your site appearance is a crucial element for your website’s success but don’t risk it using a cracked theme.
There are plentiful stunning free themes in case if you don’t have funds. Although a free theme may restrict you to do some certain customization but you will get pretty everything you needed.
And most particularly these free themes get updates to maintain compatibility.
13. Keep Everything Up-to-Date
When the developers found bugs, security holes, or want to add new features in their apps they release updates. If a hacker wants to get into your website they might also check if you are using any tool with security flaws. So it is fundamental to keep your theme, plugins, and WordPress up to date.
Tip: Run a backup of your website before updating so that if a fresh version misbehaves with your website you can instantly restore it back to the working situation.
14. Assigning Appropriate Roles to Your Team Members
Managing and running a website is no child’s play. So people generally work as a team so to effectively manage a website and try to capture success as fast as possible.
Giving everyone the administrative email and password is not a good idea as unintentionally you are risking your website security.
Fortunately, WordPress allows you to assign a role to each user. For this, you don’t have to install any plugin. Assigning an appropriate role to each user helps you to keep every member within their specified limits.
For example, if you are outsourcing your website articles then WordPress “Contributor” is the right role for them as it allows them to draft and manage their own posts. The contributor cannot publish a post.
WordPress offer 6 different roles
- Super Administrator: Someone who has the full website control as well as creating networks.
- Admin: the person with all the admin rights of a website.
- Editor: someone who can manage all posts of a single website.
- Author: Who can publish and manage their own posts.
- Contributor: somebody who can only draft and manage their own posts.
- Subscriber: who can only manage their own profile.
So if you are leading a team then you don’t need to share your administrative email and password just add new users with appropriate roles.
For assigning a role, go to the WordPress dashboard sidebar and click on Users >> Add New.
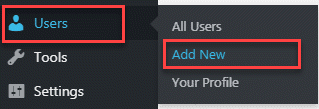
Then you just need to provide the new Username and Email. Assign the role and click on the “Add New User” button. WordPress will automatically send details on newly added email.
15. Protect Your Site From Comment Spamming
Spam comments may include malicious links to damage your website. Someone may set the bots to send you tons of comments with links in order to attempt for backlinks. These types of comments are not damaging but of course annoying, however, those comments may also contain malicious links that can harm your website.
So to fight against comment spamming attack first of make sure ‘Comment must be manually approved’.
You can change the comment setting right from your WordPress dashboard.
Go to Settings → Discussion
The comment setting allows you to decide the number of links permitted in each comment.

Moreover, there are also various anti-spam plugins helping you to fight against spam. Akismet is a popular plugin that is efficient to identify troubling comments and so filter them out.
16. Secure Your Personal Computer
Do you know your personal computer may assist the hacker in the hacking attack?
Usually, a personal computer has a higher exposure to viruses because mostly you use it to browse different websites as well as download a variety of software. Who knows a malware install alongside the software. Therefore it is essential to always turn on an anti-virus.
Now there is malware out there which a hacker uses to steal your FTP accounts login credentials. So scan your computer, which you used to login to your WordPress, on a regular basis.
17. Use Specific IPs For Login not recommended for beginners
Using this method, you can choose which IPs allowed to Log In to your WordPress admin area. So it means, if you add your home internet connection IP as the only IP for access then you will not be able to access WordPress using any other internet connection like your office internet or your mobile phone data connection.
However, here keep in mind, mostly the internet we get for home or office does not come with a static IP address. It means your internet IP address may vary from time to time.
For using this security measure, you need a static IP.
So first of all, contact your internet service provider (ISP) and ask them to provide you a static IP address. Otherwise in this method using an auto changeable IP address, you block yourself out.
After getting a static IP address from ISP just type “my IP” to get your IP address. You can also get it using a website like WhatIsMyIpAddress.
Now log in to cPanel/control panel provided by the hosting company. Locate and click on “File Manager”.
Note: Probably you don’t have .htaccess file inside wp-admin so go ahead and create a new one. Just name it .htaccess
Open .htaccess file and paste the following code
<Files wp-login.php>
Order Deny,Allow
Deny from all
Allow from xx.xx.xx.xx
</Files>
Place your address in place of xx.xx.xx.xx
If you want to add more than one IP addresses then the code should be
<Files wp-login.php>
Order Deny,Allow
Deny from all
Allow from xx.xx.xx.xx
Allow from xx.xx.xx.xx
</Files>
Save the changes and exit.
18. Install Well-Reputed Plugins
Sometimes old and outdated plugins play as a gateway for the hacker to sneak into your website. So with respect to keeping your plugins, CMS, and software up to date, you must also make sure that you are installing a trusted application.
For example, WordPress houses tons of plugins that are designed by both the WordPress developer team and the third-party developers.
Before installing a plugin always check how frequently it gets updates as well as its rating and Installations stats. If you see like 10K installations that means you can trust it. You should be especially more careful while downloading the plugin from other websites.
If you see a plugin that you needed does not have a good rating don’t be disappointed there are hundreds of plugins for every function.
19. Find Trusted and Experienced Security Expert
What if you have someone expert in cybersecurity is available for your help. Hacker’s variety of attacks shows their level of skill and how much they are specialist to steal your data. So why not a specialist defend your website. You cannot be good at all things. You might be good at marketing while others in web designing.
When it comes to secure your business you may not aware of threats or security holes which a security expert can. So investing in a trusted security person or a company for your business security surely a considerable option.
A security company perform scans for your website and can do a complete security audit to cover you from all type of potential security holes. So do your in-depth research before investing in a security specialist or expert thus at the time of a disastrous situation you got someone to cover you.
You and your team should be enthusiastic about protecting your website. You must take all the basic measures to avoid vulnerabilities. What I can say, never stop seeking a security layer that can protect your website security.
You have taken all the essential security measures but you must keep in mind that what to do if someone hacked in? That’s what the next section is about.
What to Do if Your Website is Hacked?
You probably also wondering how to fix a hacked website? Above I have mentioned the list of security measures to build a strong security wall around your website. But you should keep in mind the probability of hacking which is why you must keep in mind what to do in response.
But How Do I Know If My Site Is Hacked?
If you see the sign mentioned below it means you have been hacked.
- In Google search results your site is labeled with text like your site is hacked.
- Almost every web browser alerts your website visitors with a red screen.
- Google search console which almost every webmaster is using alert you that there is malware on your website
- To find out if your site is hacked put your domain in the following URL. This service is backed by Google https://transparencyreport.google.com/safe-browsing/search
- Your web hosting company may suspend your account temporarily
- Check your website on a good malware scanner like Sucuri Site Check.
- If some malicious code or file inside your website you may see unexpected frequent error messages.
- New admin user or FTP account created.
- You may see tons of ads on your website which you didn’t place.
Now How to Fix a Hacked Website?
First of Relax which is most important.
Contact your Hosting Company
As the hosting company houses with tech professionals, they surely have a solution for you. This is where you realize the importance of technical support while choosing a hosting provider.
Some companies even provide a guarantee that in case of any hack they are responsible for fixing your website. A good web hosting company expert always help their customer and provide the necessary guidelines to get your site online as soon as possible.
Immediately Change Your Password and Username
So a hacker logged into your WordPress but still, you have the access to your cPanel control panel provided by the hosting company.
Login to your cPanel and look for phpMyAdmin. There you can see all the users as well as can change your username and password.
Run Antivirus on Your Computer as well as Scan Your Website
So after a hacking attack, your priority should be to shut down the gateway. What if the hacker using your own computer as a gateway to hack your website. So immediately run any well-reputed updated version of antivirus and wipe out all viruses.
Additionally, there are also good malware scanners to detect malware on your website. I already mention some of them such as Sucuri, Quttera Web Malware Scanner, and Wordfence Security, etc. so make use of them to clean your website.
Restore Your Backup
Creating backups significantly improves your website security that is why backups are the foremost element of a website. You should backup all website files so that in the case of data loss or hacking attack you can quickly restore a backup and get your site to a working position when it was free from vulnerabilities.
All you need to focus here on what backup file that you made before the malware? That’s why you need to retain multiple copies of your backup. It’s a good habit to make a backup every time you update your website and also retain a backup for at least a month or more if possible.
Most Important: Request a Review
Is there something else you need to do or you have done?
It’s not done yet. You might recover your website back to a perfect working position, however, you need to submit a review for your site to Google to unflag your website.
You can find the review details here. You may have to provide some information to let Google know your site is fine now.
After submitting a review all you just need to wait. A malware review usually takes a few days while a spam hacking review may span over weeks as it is complex in nature. So be patient.
Once Google finds out that your website is clean now it will automatically remove all the alerts that appear in search engine results or browsers etc.
Conclusion
Website security is a continuous process.
Yes, implementing different security measures is an overwhelming process but you must do everything in order to improve your website security and keep your and your visitor’s information safe.
Ensuring people that your website is safe to play is key to increase your conversion rate. You may want to insert more focus for creating content for your website but never sleep on the security factor, after all, it’s the website where you are going to publish your content.
So be safe.